
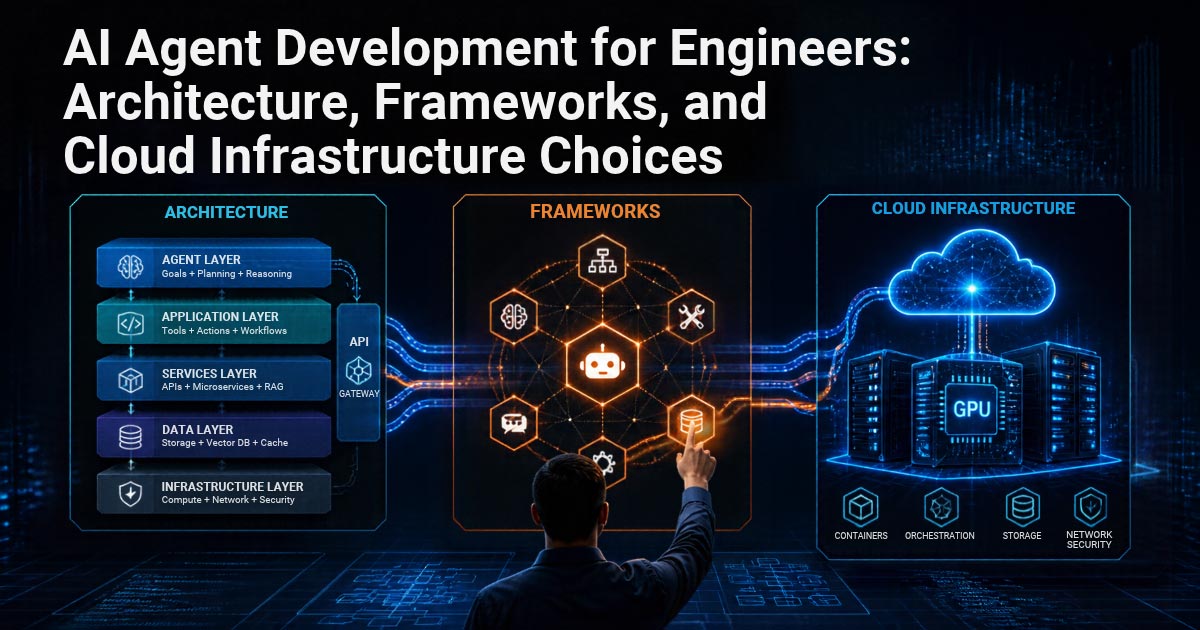
A practical, code-first look at what it actually takes to design, build, and run an autonomous AI agent in production — from your first LLM call to picking the right GPU platform.
It’s tempting to think of an AI agent as just a fancier chatbot. It isn’t. A generative AI model answers what you ask it. An agent decides what to do next, on its own, in order to reach a goal — and that difference changes almost everything about how you design, test, and operate the system.
Sooner or later, every project reaches the same production question: where does the model run, how is state managed, and how is the whole thing monitored? This guide is aimed at beginner-to-intermediate engineers who need to answer that question — it walks through the components you need, the development steps, and the cloud design patterns behind a working agent.
What Does “AI Agent Development” Actually Mean?

AI agent development means designing a system that, given a goal, decides for itself “what to do next” and combines multiple steps to complete a task autonomously. It isn’t about producing a model that gives smart answers — the starting point is designing and operating an entire autonomous system.
Agents Decide and Act
Give an agent a goal, and it will look for the information it needs, chain several steps together, and call outside tools or APIs to move the task forward — without a human specifying each step.
Take a request like “analyze last month’s sales and turn it into a report.” Left alone, an agent will typically:
- Query the database
- Aggregate the numbers
- Generate a chart
- Write up the summary
— stringing that sequence together itself, rather than waiting for instructions at each stage.
What defines an agent is this loop: observe, think, act, observe the result — repeated autonomously. Because it acts and not just advises, an agent can genuinely take work off someone’s plate. But that same autonomy means the design has to guard against mistakes and runaway behavior from the start.
How Agents Differ from Generative AI
Generative AI and AI agents play different roles. Generative AI is mostly about producing output on request — text generation, summarization, translation, brainstorming. An agent, by contrast, breaks a goal into tasks, consults data, calls external tools and APIs, and decides its next move based on what comes back.
| Generative AI (e.g. ChatGPT) | AI Agent | |
|---|---|---|
| Primary role | Output on request | Autonomous execution toward a goal |
| Unit of work | One request, one response | A repeating observe → think → act loop |
| External integration | Generally none | Executes APIs, tools, databases |
| State | Not retained across a single call | Retains step history and intermediate results |
| Human involvement | Directs every step | Sets the goal; the agent decides the rest |
Generative AI generates an answer; agentic AI acts to achieve a goal. That one distinction shapes every architecture, workflow, and infrastructure decision that follows.
Decide the Scope Before You Touch the Tech Stack

The first decision isn’t which framework to use — it’s which parts of the business you’re actually going to hand to an agent. Gartner has pointed to cost overruns, unclear business value, and inadequate risk management as reasons agentic AI projects get cancelled, and picking the wrong task to automate is one way projects end up there. The goal isn’t a do-everything agent; it’s knowing where an agent genuinely fits.
Good Candidates for Agent Automation
Agents work best on tasks where the steps are reasonably well defined, the information needed is clear, and it’s easy to judge whether the output is any good. Standardizable steps map cleanly onto a workflow; clear reference material can be fed in through RAG; and an easily judged outcome means you can actually iterate and improve.
| Characteristic | Example |
|---|---|
| Standardizable process | First-line inquiry response, routine reporting |
| Clear reference material | Internal knowledge search, FAQ response, spec lookup |
| Easy to evaluate | Data aggregation and analysis, code review assistance |
| High-volume, repetitive | Log monitoring/summarization, data entry, system integration |
A Cloud Ace survey backs this up: help-desk and internal inquiry response was the most common area where companies are already using agents, with system monitoring/operations and data analysis each used by over 40% of respondents. These are sensible places to start.
Tasks Better Left Alone — For Now
The flip side: avoid tasks where a mistake causes serious damage. High-value contract or credit decisions, high-risk calls in legal, medical, or financial domains, destructive operations on core systems, and any task built on unreliable data are all poor fits for agent automation today.
| Poor fit | Why |
|---|---|
| High-value contract/credit decisions | Mistakes are costly and hard to justify |
| Final legal/medical/financial calls | Regulation and ethics require a human in the loop |
| Destructive operations on core systems | An error can directly threaten business continuity |
| Low-quality underlying data | Bad inputs mean the output can’t be trusted either |
None of this rules these areas out entirely — but if you do go there, design for it: require human sign-off, or restrict the agent to read-only access. Drawing that line — what you’ll hand off and what you won’t — is the real starting point of agent development.
The Core Building Blocks
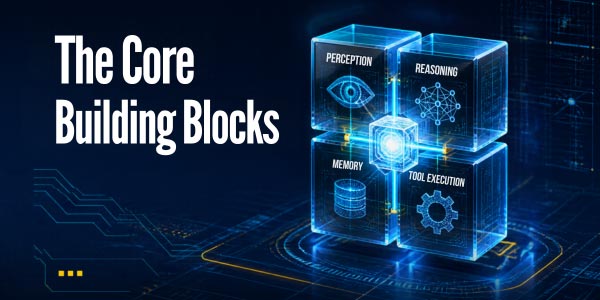
From here it’s hands-on. A production agent is built from five components — the LLM, RAG, API/tool integration, the workflow/execution loop, and logging and permissions — and it’s worth walking through each with a minimal, working example.
Level 1: The LLM
The LLM is the “brain” — it interprets instructions, breaks a task down, decides the next move, and generates output. Everything starts with the simplest possible version: a single call.
# Level 1: call the LLM once — the smallest possible unit of an agent

from openai import OpenAI

client = OpenAI()  # reads OPENAI_API_KEY from the environment automatically

resp = client.chat.completions.create(

    model="gpt-4o-mini",

    messages=[{"role": "user", "content": "Explain an AI agent in one sentence"}],

)

print(resp.choices[0].message.content)
Common snag: an `openai.error.AuthenticationError` almost always means the API key isn’t set — check with `echo $OPENAI_API_KEY` (`echo %OPENAI_API_KEY%` on Windows). Older sample code using `openai.ChatCompletion.create(…)` won’t run on the 1.x SDK; check the official function-calling docs for the current syntax.
RAG and Knowledge Bases
An LLM only knows what it was trained on — it has no idea about your internal policies or your latest spec. RAG (retrieval-augmented generation) fixes that by pulling relevant documents into the prompt, so the model answers from evidence instead of guessing.
# Minimal RAG: hand the model relevant documents and let it answer from them

from openai import OpenAI

client = OpenAI()

# In production this would be a vector DB search (e.g. FAISS/Chroma); simplified here

knowledge = [

    "Employees receive 10 days of paid leave starting six months after joining.",

    "Remote work can be requested for up to three days a week.",

]

question = "How many days of paid leave do I get?"

# naive keyword match — replace with similarity search in a real system

context = "\n".join(d for d in knowledge if "leave" in d)

resp = client.chat.completions.create(

    model="gpt-4o-mini",

    messages=[

        {"role": "system", "content": f"Answer only from the internal information below:\n{context}"},

        {"role": "user", "content": question},

    ],

)

print(resp.choices[0].message.content)
Common snag: if the search misses and `context` comes back empty, the model will hallucinate an answer. Tell it explicitly, in the system prompt, to say “I don’t know” when nothing relevant is found, and add a check for empty context before you even call the model. The LangChain RAG tutorial is a good next step for a real implementation.
Level 2: APIs and External Tools
An agent doesn’t just answer — it hits search APIs, writes to a CRM, posts to Slack. That’s what function calling (tool calling) is for: giving the model a set of tools it’s allowed to use.
# Level 2: function calling — let the model use a tool

import json

from openai import OpenAI

client = OpenAI()

def get_weather(city: str) -> str:

    # would call a real weather API; hardcoded here for the example

    return json.dumps({"city": city, "temp": 28, "weather": "sunny"})

tools = [{

    "type": "function",

    "function": {

        "name": "get_weather",

        "description": "Returns the current weather for a given city",

        "parameters": {

            "type": "object",

            "properties": {"city": {"type": "string", "description": "City name"}},

            "required": ["city"],

        },

    },

}]

messages = [{"role": "user", "content": "What's the weather in Tokyo?"}]

resp = client.chat.completions.create(model="gpt-4o-mini", messages=messages, tools=tools)

msg = resp.choices[0].message

# if the model asked for a tool call, run it

if msg.tool_calls:

    call = msg.tool_calls[0]

    args = json.loads(call.function.arguments)

    result = get_weather(**args)

    messages += [msg, {"role": "tool", "tool_call_id": call.id, "content": result}]

    final = client.chat.completions.create(model="gpt-4o-mini", messages=messages)

    print(final.choices[0].message.content)
Common snags: (1) once `tool_calls` comes back, you must send the result back as a `role: “tool”` message before the exchange is complete — skip it and the next call fails with a `400 Bad Request`. (2) `function.arguments` is a JSON string, so `json.loads` is required. (3) models sometimes pass arguments that don’t exist — add type checks and error handling inside the tool function itself. Anthropic’s tool-use documentation is a useful reference for tool design.
The golden rule of tool design: enforce dangerous limits in code, not in the prompt. “This query is read-only” or “the delete endpoint isn’t exposed” should be true because of how you built the tool, not because you asked the model nicely.
Level 3: Workflow and Execution Loop
Once a single tool call works, the next step is the observe → think → act loop repeating on its own — this is where an agent starts to feel like an agent. It’s also where you need real guardrails against runaway behavior.
# Level 3: a self-built agent loop, capped to prevent runaway execution

import json

from openai import OpenAI

client = OpenAI()

MAX_STEPS = 5  # safety valve against infinite loops and runaway cost

messages = [{"role": "user", "content": "Which is hotter, Tokyo or Osaka?"}]

for step in range(MAX_STEPS):

    resp = client.chat.completions.create(

        model="gpt-4o-mini", messages=messages, tools=tools

    )

    msg = resp.choices[0].message

    if not msg.tool_calls:  # no tool needed = final answer

        print(msg.content)

        break

    messages.append(msg)

    for call in msg.tool_calls:  # the model may request several tools at once

        args = json.loads(call.function.arguments)

        result = get_weather(**args)

        messages.append({"role": "tool", "tool_call_id": call.id, "content": result})

else:

    print("⚠️ reached the maximum number of steps")  # the loop never resolved
Common snag: without a safety valve like `MAX_STEPS`, the model can keep calling tools indefinitely and your API bill grows unbounded — exactly the kind of cost blowout Gartner flags as a reason projects get cancelled. In production, add a timeout and a per-task token cap on top of the step limit.
Logging and Permissions
Because an agent acts autonomously, you need to be able to trace who asked for what, what data it looked at, which tools it ran, and what happened. Just logging each step already makes debugging and cost analysis far easier.
# Log each step's model output, tool execution, and token usage

import logging

logging.basicConfig(level=logging.INFO)

logging.info("step=%s tokens=%s tool=%s",

    step, resp.usage.total_tokens,

    [c.function.name for c in (msg.tool_calls or [])])
Common snag: logs that capture raw user PII or API keys are a recurring incident — mask them. For serious tracing, look at an observability tool such as LangSmith. On permissions, the rule of thumb is to scope any API key or IAM role you hand to an agent down to the minimum it needs.
The Six-Step Development Process
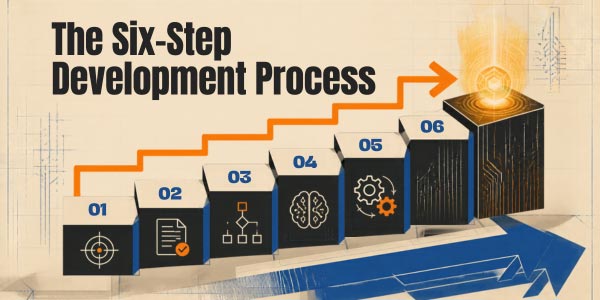
With those building blocks in mind, an actual project moves through six steps:
- Define the goal and the target task
- Choose the LLM and data sources
- Design the agent’s workflow
- Wire up RAG and APIs
- Verify behavior in a test environment
- Iterate using logs and evaluation metrics
Nail down exactly what the agent is meant to accomplish: the task, the input, the expected output, and what “success” looks like. Leave this vague and you can’t evaluate or improve anything later.
Weigh accuracy, cost, and data-handling requirements to pick a model that fits the job. This is also when you plan out the internal documents or databases RAG will draw on.
Decide the order the agent reasons in, which tools it calls and how, whether one agent handles everything or the work is split across several, and where a human needs to sign off. This design decides how stable things are later.
Build and connect the retrieval layer and the tools (APIs/functions) called for in the design. Define an input/output schema for each tool, and enforce constraints on anything dangerous at the implementation level. This is the point where the agent can genuinely “think and act.”
Before going live, run representative tasks in a test environment and check the behavior — not just the happy path, but unexpected inputs, tool failures, and loops that don’t terminate. Building an evaluation dataset here makes later improvements measurable rather than a guessing game.
After release, keep improving based on logs (traces) and evaluation metrics. Measure what actually failed and how before you touch the prompt, model, or workflow — tuning without measurement leaves you unable to tell whether things got better or worse.
Tools and Frameworks Worth Knowing
You don’t need to build everything from scratch. The right tool depends on your goal and skill level — broadly, there are four categories:
| Type | Examples | Good fit for |
|---|---|---|
| No-code / low-code | Dify | Fast prototyping, non-engineers involved |
| Code-first | LangChain / LangGraph | Fine-grained control, custom logic |
| Multi-agent | CrewAI / AutoGen / LangGraph | Complex tasks split across roles |
| Cloud-integrated | AWS / Azure / Google Cloud | Integrating with existing cloud infrastructure and production ops |
No-Code / Low-Code
These let you assemble an agent through a GUI — connecting blocks or flowchart steps into a “trigger → process → action” chain with almost no code. Dify, n8n, Zapier, and Microsoft Power Automate are common examples. A flow like “when a contact form comes in, summarize it with an LLM, then post to Slack” can be built in minutes without writing a line of code. The appeal is speed of setup and the fact that non-engineers can operate it — a good fit for prototyping or automating internal workflows.
Code-First
LangGraph turns the loop, branching, and state management you hand-rolled at Level 3 into a few robust lines. Compare it against the loop above:
# Level 4: a prebuilt ReAct agent using LangGraph

from langchain_openai import ChatOpenAI

from langgraph.prebuilt import create_react_agent

def get_weather(city: str) -> str:

    """Returns the current weather for a given city"""

    return f"{city} is sunny, 28°C"

agent = create_react_agent(ChatOpenAI(model="gpt-4o-mini"), tools=[get_weather])

result = agent.invoke({"messages": [{"role": "user", "content": "What's the weather in Tokyo?"}]})

print(result["messages"][-1].content)
Common snag: LangChain/LangGraph’s API changes fairly often between versions, so older sample code you find online frequently won’t run as-is — check the current LangGraph documentation rather than trusting an old blog post.
Multi-Agent
Rather than one do-everything agent, a multi-agent setup splits the work across several agents with distinct roles — closer to a human team, with a “design,” “implementation,” and “review” role handing results to each other. Common frameworks include LangGraph, CrewAI, Microsoft AutoGen, and the OpenAI Agents SDK. Typical patterns range from an orchestrator that directs the others to peer agents that debate their way to an answer.
The upside is that each agent’s role and toolset stays narrow, which helps accuracy and maintainability on complex tasks; the downside is added design complexity, and token usage and runtime tend to grow as the agents exchange more back-and-forth.
Cloud-Integrated
This category runs the agent’s execution environment on a cloud platform, handing authentication, scaling, monitoring, and external integrations to the platform itself. Examples include Amazon Bedrock AgentCore, Google Vertex AI Agent Builder, and Azure AI Foundry Agent Service.
These typically come with the pieces production actually needs — connections to internal databases and SaaS tools, access control, audit logging, and auto-scaling under load. The trade-off is vendor lock-in, usage cost, and a learning curve, in exchange for not having to build security, availability, and operational monitoring yourself.
The Upside and the Limits of Relying on OpenAI’s API
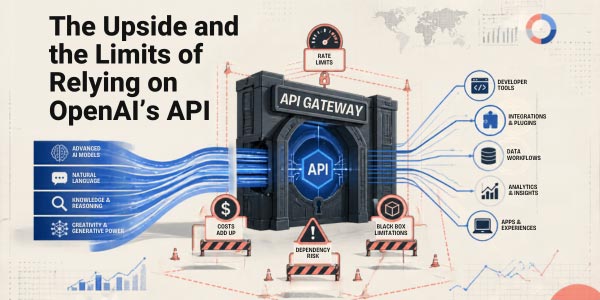
Most projects start by reaching for a model API from OpenAI, Anthropic, or similar. It’s worth understanding both sides of that choice before you commit to it.
API Access Speeds Up Early Development
Using an API means you get a state-of-the-art LLM into your agent immediately, without building or provisioning any model or GPU infrastructure. There’s essentially no infrastructure burden, and scaling is the provider’s problem. For the proof-of-concept stage — figuring out whether the agent concept even works, and what tools it needs — depending on an API is a genuinely sound choice.
Production Surfaces Cost, Data, and Availability Problems
Those problems show up once you scale:
- Cost: an agent calls the LLM multiple times per task, so token billing scales with usage — and grows faster the more the Level 3 loop runs.
- Data handling: sending confidential or personal data to an external API runs into compliance constraints for plenty of organizations.
- Availability: rate limits, latency, and the risk that a model changes or gets deprecated are all external dependencies you’re exposed to — a provider-side update can change how an existing prompt behaves.
Common snag: you will hit `429 Too Many Requests` in production — build in retries with exponential backoff. On cost, start by logging `resp.usage.total_tokens` for every request so you know the average token cost per task.
Considering a Self-Hosted or Dedicated Setup
Once you need to keep internal data under stricter control, API costs are climbing, or you want to control latency and availability yourself, running your own model becomes a realistic option. Most production systems don’t need to go all-in either direction — a hybrid split, where higher-level judgment goes through an external API while confidential data or high-volume routine processing runs on a self-hosted model, is where a lot of teams land.
Choosing a Cloud Architecture and GPU Platform
Moving to self-hosting means running the LLM yourself. Standing up an open model behind an inference server exposes it as an OpenAI-compatible API, so most of your client code carries over unchanged.
# Level 5: serve an open model as an OpenAI-compatible API with vLLM

pip install vllm

vllm serve Qwen/Qwen2.5-7B-Instruct --port 8000

The client side just needs to point at the new base_url — the Level 1-4 code carries over almost as-is:

# Client side just points at a different base_url

from openai import OpenAI

client = OpenAI(base_url="http://localhost:8000/v1", api_key="dummy")

resp = client.chat.completions.create(

    model="Qwen/Qwen2.5-7B-Instruct",

    messages=[{"role": "user", "content": "Introduce yourself"}],

)

print(resp.choices[0].message.content)
Common snags: (1) expect to see `torch.cuda.OutOfMemoryError` often — as a rule of thumb, an unquantized model needs roughly twice its parameter size in VRAM (16GB+ even for a 7B model). Lower `–max-model-len` or use a quantized version to work around it. (2) watch for a slow cold start on serverless GPU — the first request after idle time can be much slower. The official vLLM docs cover this in more detail.
From here, the choice of GPU infrastructure comes down to operational burden versus cost control:
| GPU platform | Characteristics | Best-fit phase |
|---|---|---|
| Serverless GPU | Pay only for what you use, near-zero ops | Prototyping, irregular inference |
| RunPod / Replicate | Easy to deploy and expose a model | Early testing to small-scale production |
| Dedicated GPU instance | Stable, exclusive performance | Production, sustained use |
| On-premise GPU | Full control, owned hardware | High-compliance or large-scale needs |
Serverless GPU
A serverless GPU spins up only when a request arrives and shuts down automatically once it’s done, billed by usage — you call it “like a function” without thinking about keeping a server running. The main advantage is cost efficiency: no charge during idle time, so it suits irregular inference APIs, image generation, or occasional batch jobs particularly well.
The weak point is cold start — after a period of inactivity, loading the GPU and model back up can take anywhere from seconds to tens of minutes, delaying the first response. For a service under constant heavy traffic, this can end up costing more than simply keeping an instance running.
RunPod and Replicate
These are the two go-to services for accessing serverless GPU easily.
| Comparison | RunPod | Replicate |
|---|---|---|
| Concept | Flexible GPU infrastructure | Publish and run models as APIs |
| Offering | Serverless + Pods | Serverless inference API-centric |
| Main use | Custom training/inference pipelines, dev environments | Instant use of public models, API-izing your own model |
| Deployment | Configure a Docker container | Package with cog and publish |
| Public model access | Bring/build your own | Wide catalog ready to run instantly |
| Customization | High | Limited |
| Training use | Well suited | Some support, but inference-focused |
| Pricing | Per-second/hour billing | Per execution-second/request |
| Cold start | Present, or none with always-on Pods | Present |
| Learning curve | Somewhat steep | Low |
| Best for | Engineers who want fine control over their environment | Anyone who wants a model running fast |
Both are relatively inexpensive, but price and availability shift with GPU type, stock, and region — worth benchmarking before committing to production.
Dedicated GPU Instances
Here you rent a GPU exclusively for a fixed period — AWS EC2 GPU instances, GCP, and various specialized GPU cloud providers all fall in this category. The advantage is stable, predictable performance and full control: no cold start, and no competing with other tenants for resources, which suits large-model training, sustained high-load inference, or long-running jobs.
You can configure the environment freely, and a monthly or annual contract can end up considerably cheaper than pay-as-you-go. The downside is that idle time is still billed — a poor trade if demand is unpredictable or usage is only intermittent. As a rule of thumb: consistently heavy use or training-scale workloads favor a dedicated instance; irregular, small-scale, inference-first use favors serverless.
On-Premise GPU
On-prem means buying and operating the GPU hardware yourself rather than renting it from a cloud provider — anything from a full data-center rack to a workstation-scale setup in an office or lab. Owning the hardware as an asset is the core difference from any cloud option.
Advantages: the standout is long-run cost. Cloud usage-based billing keeps accumulating, but once on-prem hardware is paid off, the ongoing marginal cost is close to electricity and maintenance — often cheaper over a multi-year horizon for workloads that run training continuously. Data control and security are also a real strength: never sending data outside the organization suits domains like healthcare, finance, and anything handling personal data, and makes compliance easier to satisfy. Performance is stable and exclusive too — no contention with other tenants, and you can optimize your own network and storage, which makes latency more predictable.
Disadvantages: the upfront investment and procurement are a real barrier — high-end GPUs (NVIDIA H200/B200-class, for instance) are expensive and can be hard to get hold of quickly given demand. Operational load is significant too: power capacity, cooling, rack space, driver and firmware updates, and hardware failures are all now your problem, and that typically means dedicated specialist staff. Scalability is also a weakness — you can’t simply add capacity on demand, and idle hardware during quiet periods is still a sunk asset; workloads with sharply variable demand don’t suit on-prem well. And the technology moves fast enough that hardware can depreciate within a few years.


Comments